Showing posts with label tutorial. Show all posts

Saturday, April 27, 2013

Yarn wrapped coat hanger hearts


What started out as a lovely autumn morning planting a new crop in our veggie garden, spiralled into a full day outside enjoying the sunshine and fresh air, and getting creative.

I thought I'd share this little tutorial of how I made yarn wrapped hearts.

First I got some old wire coat hangers and bent them into heart shapes. I just did this with my hands, and then used the pliers to cut the bottoms off (the hook part). If you want to be a bit more perfect with your heart shapes you can use the pliers to give a better shape.


Then I cut off a length of yarn and tied it to the peak of my coat hanger, and wrapped the bottom bit tightly with my yarn. I'm using this wide yarn called 'fish net' yarn which comes in these gorgeous bright colours.


Basically I just kept wrapping fairly tightly and crossing over whenever I felt like it.


Then it was just more crossing and wrapping. When I ran out of yarn I just cut off a bit more and tied a knot to keep going. I wrapped some yarn around the knot to disguise it a bit.


 Here's my finished heart, tied to my fence.


And another one.

I've got four kids, so I had to make 4 hearts. Yes, they make me smile.


It was lovely outside, so I used the last bit of sunshine to do some more sewing of blankets onto my trees. My yard is doing a lot of smiling on it's own now, and it's a very happy place to be.


I live in the best place on earth!

Wednesday, March 27, 2013

Easter egg love


Easter came a little early at our house tonight, just for fun. Impulsive me decided to make a decorated egg with a message inside for Mr Crafty. A bit of a comedy of errors but in the end it was lots of fun and all turned out quite nicely.

Here's how it went down.....

I used a drawing pin to put a little hole in this egg.


And a bigger one in the other end. Then I blew the yolk and white out from the egg.


Having no idea how to colour eggs, I just went ahead with my usual lack of planning and rolled it around in water and food dye.

It came out looking hideous. Not to mention my hands.


So I decided to paint over the top of that atrocity. Ok, still extremely unattractive.


So I moved on for a bit, to give my brain some breathing space. I found an old envelope, (looks like it has Vegemite on it) and wrote a little love note to Mr Crafty.


Cut it out, rolled it up like a scroll, and popped it inside the egg.


I'd had some time to regroup, so I dragged out some little golden book pages and chopped them up into tiny pieces and then glued them onto the egg.


Starting to look a bit better. Phew! Decided on a glass of red to calm the nerves a bit.


 I wrapped a recycled gift box with some of the book page too. Super cute picture.


Ready to gift.

Mr crafty was intrigued.

And then he was a little bit chuffed.


I think I just made a tough day for someone I love just a little bit more joyous, and that fills my little heart with joy too. If you are having a break over Easter, I hope you have a wonderful rest and relax. 

Monday, March 25, 2013

Converting a tea towel into an apron


My Mum's birthday is this week so I decided to make her this apron using one of the gorgeous Irish linen tea towels my Nan had stashed away in her cupboard.

Step 1 - Find an awesome tea towel.


Step 2 - Get some ribbon (I reclaimed this ribbon from a birthday present wrapping)


 Step 3 - Cut 2 diagonal pieces from the top of the tea towel for the arms.


 Step 4 - Fold the raw edges under and then under again so that the raw edge is hidden. Then sew along the 2 edges. I used a double row of stitching because I think it looks a bit nicer.


Step 4 - Cut your ribbon into three pieces, one piece to go around your neck and one on each side of your waist to tie around your waist. Sew them on as shown below. In the picture above you can see that I used a cross to strengthen the bond where I sewed the ribbon on, just to be sure. I also folded the ribbon under twice before sewing to hide the raw edge of the ribbon (like a hem).


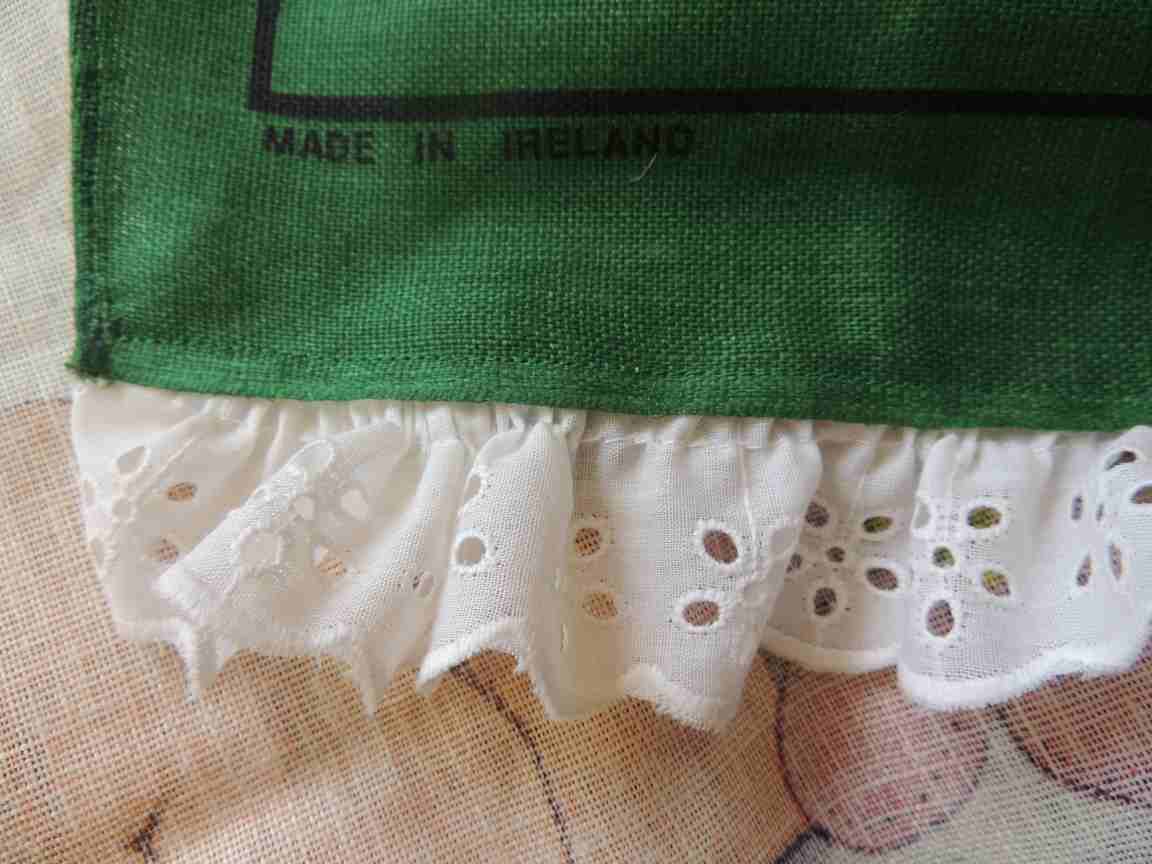
Step 5 - This is an optional step. I'm making it a bit more girly by adding some lace. I gathered the lace a little by sewing 2 rows of stitching along the top and pulling the top threads. Then I sewed this gathered lace to the bottom of the apron to make a frill.


Finished!